Refinish an Antique Coffee Table
So you’re out shopping, maybe you’re at a Goodwill or an off-the-beaten-path antique store, or maybe a garage sale.
Suddenly, from across the way, you spot it: the perfect coffee table! It’s the right size, the right shape, but oh, wait… The color, the color is all wrong! You sigh, turn away and continue on.
Wait! You go back and check the price. It’s a serious bargain so you buy it anyway. After all, you can refinish it and it will be a perfect fit for your living room.
If you’re looking to refinish an antique coffee table, you’ve come to the right place. Surprisingly, refinishing a piece of solid wood furniture is not at all difficult if you’ve researched and prepared yourself (and ahem, have the patience to complete the task).
Remember, this is not a one-day job, though you might be able to finish it in a single weekend depending on the complexity of the table.
Whatever the case may be, never rush the process! Rushing leads to mistakes and mistakes lead to money poorly spent, and then your bargain coffee table is no longer a bargain but a big, expensive mess.
A Refinished Antique Coffee Table

My final reward – Antique Coffee Table!

In case anyone was wondering, this is the ‘before’ color of the antique coffee table
Supplies for Refinishing an Antique Coffee Table
It is extremely important that you have all of these tools. You may think you don’t need one or two of these items, but you’ll be sorry if you don’t! You’ll end up running back to the home improvement store at 9:59 p.m. just to pick it up (and I speak from experience on that one!)
Items necessary:
- Goggles
- Chemical-resistant rubber gloves
- Chemical-resistant drop cloth
- Odor and particle mask
- A paint and stain Remover (also referred to as a stripper)
- Paint stripper after a wash or mineral spirits
- 2 to 3 inexpensive, natural bristle brushes for applying stripper
- 2 empty, clean coffee cans or metal buckets
- Plastic or metal scrapper
- Steel wool
- Lint-free white rags
- New paint or stain
- Polyurethane
- 1 to 2 large bottles of vegetable oil
When choosing a paint stripper, I recommend choosing a gel or paste version rather than a liquid version. The liquid version, obviously, is runny and can get everywhere. The gel or paste version will stay put and is better for someone with little (or no, as in my case) experience.
Furthermore, when working with paint and stain strippers, be sure to wear chemical-resistant gloves specifically for removing paint and stain. They will be in the same aisle as the paint stripper (probably right next to the product).
I speak from personal experience when I say that when this stuff gets on your skin, you will be sorry! It burns, to say the least.
Also, in that same aisle, you should grab one of those specialized masks that help reduce the number of fumes and particles that you inhale. I recommend one of these as well, as you may find yourself getting light-headed, sick, or otherwise after a few minutes of working with the paint stripper.
Step 1: Protect the Area
Work in a well-ventilated area, as this will help reduce fume inhalation. If you are working in a basement that has no windows or ventilation, then I recommend finding another area to do your project in. If there aren’t any other options, be sure to take several breaks throughout the entire process, for your own health and sanity.
Lay down a chemical, paint, and stain-resistant drop cloth. I refinished the coffee table in the photos in my garage on newspaper, but I wish I had purchased a drop cloth. There are now several stains covering my garage floor. Enough said.
Step 2: Preparing and Stripping the Coffee Table
Set aside an entire afternoon for this step. If possible, remove the legs of the table and set them aside. Each leg should be done separately.

Be sure to remove the table legs before beginning!
As per your paint stripper’s recommendation, apply a coat of stripper to small sections of the table. Do not, I repeat, do not apply to the entire table at once.
The stripper will dry if you don’t work in small sections, which will require you to reapply the stripper and thus cause the entire process to take longer than if you had just done one more section at a time. So, work in small sections. A square foot or two, but no more.
The stripper should be left on for several minutes, anywhere from as little as 5 minutes to as long as half an hour (or more, with some products). Follow your product’s recommendations.
Once the appropriate time has passed, use your plastic or metal scraper to remove the stripper from the table. You should see a gooey, sticky (but relatively easy to remove) mass of gunk forming as you run your scraper down the table.
Drop the stripper gunk (that’s a technical term, mind you) into a metal coffee can. It is important that you dispose of this product in metal, as it will eat through plastic, paper, and a number of other materials.

The top half of this photo shows the un-stripped section with gel stripper applied; while the bottom half shows the partially stripped section
Also, I recommend using a plastic scraper tool. Through research, I found several people complaining of accidentally scratching or denting their furniture while working with a metal scraper.
I used a plastic scraper (chosen from the same aisle that you purchase your paint stripper chemicals from, as these are able to withstand the chemicals) and was quite pleased with the results. However, the choice is ultimately up to you.
If your table has rounded or beveled edges, then the steel wool will come in handy here. you can use the steel wool to gently remove the stripper gunk from the edges, as the scraper would be too time-consuming and difficult.
This is also the time when you’ll be grateful for buying multiple brushes. As the day wears on, you’ll notice that the bristles are slowly being eaten away by the stripper.
This is normal and completely unavoidable; which is why it is so important to purchase a cheap, inexpensive brush. Remember, you will never, ever be able to use that brush again. Ever.
Also note, once you’ve finished the stripper process, be sure to read through your chosen product’s warning label. Some strippers are flammable and may spontaneously combust (yes, it’s true, and no, I didn’t learn that the hard way, thankfully).
Therefore, it may be necessary to spray down the contents of your metal bucket with water and dispose of it properly as per the recommendations on your product label.
If you have completed the stripping process properly, you should not have to sand the table. Sanding is not only time-consuming but unnecessary when using paint strippers.
Furthermore, sanding (especially if you are inexperienced) can cause you to remove too much wood in one area and not enough in another, resulting in an uneven surface.
Step 3: Cleaning Up an Antique Coffee Table
Once you’ve finished stripping the antique coffee table, you’ll need to remove any remnants of the chemical. This is where paint stripper wash comes in. I chose one that mentioned quick drying, as I am an impatient person and wanted to start staining as soon as possible.
You can choose to do this too, there were no issues with quick-drying after washing. However, if you choose to clean your freshly stripped table with mineral spirits, you may need to allow it several days’ worth of drying time before you can apply any paint or stain.
It should be noted that mineral spirits are cheaper than after washing, but again, the choice is yours.

This is a fully stripped antique coffee table
Step 4: Staining an Antique Coffee Table
Aha, the moment is here and you are finally ready to re-stain (or re-paint) your coffee table. Using your white, lint-free cloths, apply the stain evenly to the entire table.
It is absolutely of utmost importance that you use lint-free cloths, or even a high-quality brush, to apply the stain (or if you are applying paint, you should use a brush, naturally).
Using cheap clothes or something you have laying around the house will result in small pieces of lint and hair trapped in the finish. No one wants this. If you’re a perfectionist, it will drive you up the wall to see and feel all those tiny little bumps and specks of imperfection in all your hard work.
Refinishing a coffee table is hard work, so patience is important for steps like these. The after-wash is meant to clean off the coffee table, remove any remaining stripper and also remove any dust and particles from the table. This allows the stain (or paint) to go on smoothly and gives you a beautifully refinished table that you’ll cherish for years.

Beginning stages of staining the coffee table
Allow the stain (or paint) to dry for a minimum of whatever time is listed on your chosen product. This is vital, as not allowing it to dry thoroughly between coats can result in things like fingerprints and the like in the finish.
This is likely the reason my antique coffee table took so long to refinish. I let each coat of stain dry for twice the recommended time. Though, to be fair, better safe than sorry.

This is my antique coffee table after one coat of stain. I ended up putting 3 coats of stain on before I was satisfied with the results
Stop 5: Polyurethane
When you are finally pleased with the color of your coffee table and it has been allowed to dry fully, you can finally apply that coat of polyurethane. I recommend using at least two coats. My specific product actually recommended three to four, but I was satisfied with two coats.
However, before you apply the polyurethane, it is important that you wipe up any dirt, dust, or debris that may have accumulated on the surface of your coffee table.
Otherwise, the poly coat will seal up those little particles into your surface and if you’ve chosen the high gloss finish, you will see all those little particles and bumps. It won’t be pretty, so take the time to wipe down the surface thoroughly with a slightly damp (not soaking wet) cloth and let it dry for at least half an hour or so.
Apply the polyurethane with a high-quality brush. When you’re done with the first coat, you can wash the brush out using vegetable oil. Yes, vegetable oil really works! If you’ve gotten any polyurethane on your skin, vegetable oil will also help remove that, too.
It is important that you thoroughly clean out your brush using vegetable oil, otherwise, the brush will harden, seal itself, and become worthless. Don’t be afraid to use lots and lots of vegetable oil.
Repeat until the desired sheen and finish has been achieved and voila! You now have refinished your own antique coffee table. See, now that wasn’t so hard, was it?

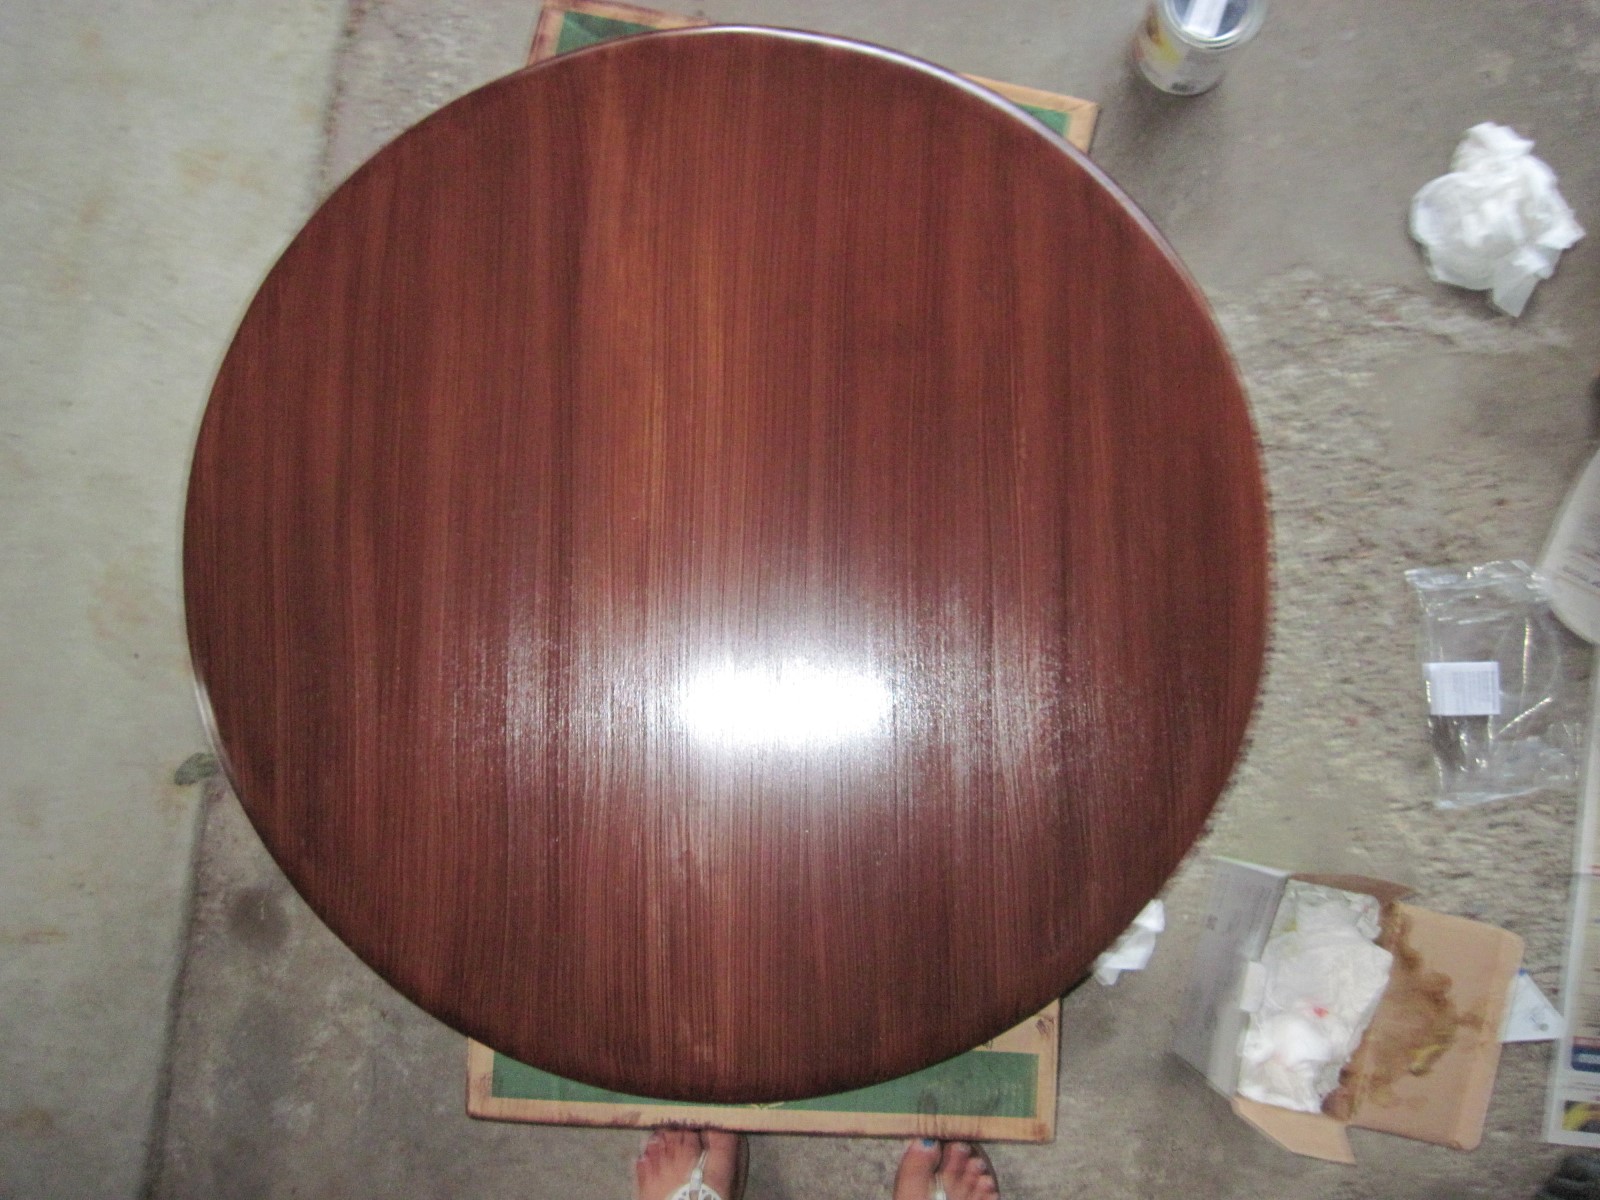
The finished product: a gorgeous shade of reddish brown with two coats of semi-gloss polyurethane
Perla Irish, who is more familiarly known as Irish, is the Content Manager at newfld.com. She loves following trends around home and garden, interior design and digital marketing. Through this blog, Irish wants to share information and help readers solve the problems they are experiencing.